

|
<< Click to Display Table of Contents >> Navigation: »No topics above this level«  |
This button on the top toolbar shows a pop-up dialog box where you can add contours and outlines to polygons.
(see also "Outlining shapes")
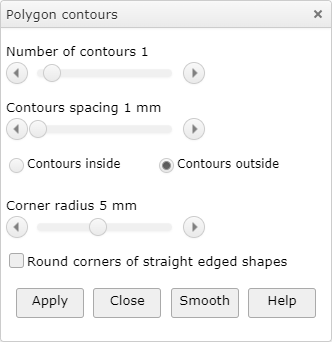
Select the "Contour shapes" tab as in the picture
Select a shape in the drawing area. This can be any shape with sides that are straight lines of curves, but no grouped shapes or compound paths.
Use the sliders to set the number of contours to be drawn and the spacing between the contours.
There are three size ranges:
▪1 to 10mm (default)
▪0.1 to 1 mm
▪0.01 to 0.1 mm
Contouring uses the line width of the shape you are contouring not the line width set in the panel on the right, so when using a very small contour space you will need to set the line width of the shape first or set the line width of the shape(s) and contour(s) after. With very close contours you will need to zoom in to see the resut.
Contours can be added on outside (default) or the inside of the shape.
When drawing contours inside a shape, only a certain number will fit depending on the contour spacing. The program will attempt to stop the drawing if the number of contours exceeds the number that will fit.
However, this may not work with irregular polygons. In this case just click the ![]() undo button on the top toolbar and then use the sliders to reduce the number of contours and/or the spacing.
undo button on the top toolbar and then use the sliders to reduce the number of contours and/or the spacing.
Contouring text

This is the result of contouring text using a line width of 0.2mm and a contour spacing of 0.7mm.
N.B. In order to draw a contour the text is converted to a path i.e. it is no longer text so you can't edit it.
You can modify the paths like any other drawing shape.

In the above, the contour fill colour is set to red and the inside shape has the fill colour set to yellow.
How to get the best results when contouring shapes:
Open and closed shapes
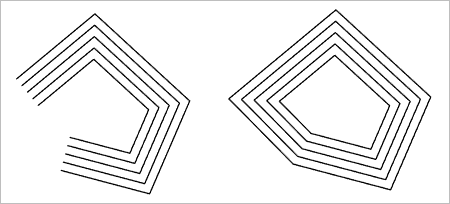
You can add contours to both open and closed shapes.
Rounded corners
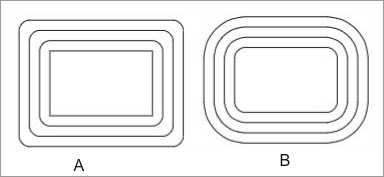
In picture B, the starting shape already has rounded corners, so the "Round corners" option is ignored and the contours do not have a constant corner radius.
Rounding the corners of the original shape
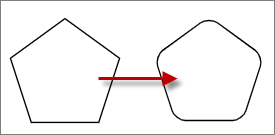
• Choose a shape with straight edges.
• Check the Round corners option.
• Set the number of contours to zero.
Colours and effects
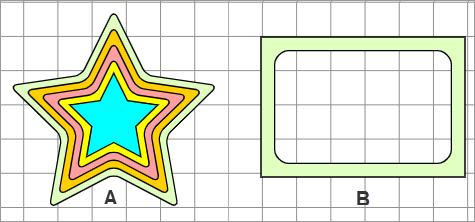
Picture B was made by starting with a rectangle, adding 1 contour on the side then selecting both shapes and XOR-ing them.
Tip:Turn the grid snap off before doing this or a shape may move slightly when selecting it.